Teslamate Setup: Docker, Fleet API & Grafana
Update, December 2025: This article has been revised to reflect the recent changes to the Tesla Fleet API and current Teslamate versions.
Modern vehicles now offer API interfaces that let you pull all kinds of data. Tesla was one of the first manufacturers to expose this comprehensively, and software like Teslamate grew out of that. Teslamate is a self-hosted, open-source data logger that continuously captures your Tesla’s data, stores it, and visualizes it with Grafana.
What changed in 2025?
The key updates at a glance:
Tesla Fleet API: Tesla replaced the unofficial “Owner API” with the official Fleet API. Since February 2025, a pay-per-use model applies, with a $10/month free allowance. For private users with 1-2 vehicles, that allowance is usually enough; heavier usage adds roughly $2-5/month.
PostgreSQL 17: Teslamate now requires at least PostgreSQL 16.7 or 17.3. The developers recommend PostgreSQL 17.
Fleet Telemetry: New is the option for the vehicle to stream data directly. This is more precise and cheaper than classic polling, but more complex to set up. Fleet Telemetry requires your own server endpoint and TLS certificates — the vehicle then streams data via WebSocket whenever values change. That saves on API costs since you no longer have to poll actively, and you get high-frequency data with minimal latency, especially while driving. For most users, though, the tried-and-tested polling approach still works fine and is considerably easier to set up.
Teslamate – Install It Yourself, or Pay for a Service?
Teslamate isn’t a software-as-a-service — you install and run it yourself. Whether that’s on your home homelab or on a VPS in the cloud, e.g. with Netcup (external link) , both work fine. I host it on my own server on my home network.
Installation is straightforward with Docker . You need a database (PostgreSQL) and the application container. For visualization, Teslamate relies on Grafana with pre-configured dashboards.
Prerequisites
Hardware & software:
- A server with at least 2 GB RAM (Raspberry Pi 4/5, NAS, VPS)
- Docker and Docker Compose installed
- A permanently active internet connection
Tesla account:
- Tesla account with two-factor authentication
- A Tesla Developer account (free at developer.tesla.com (external link) )
Setting Up a Tesla Developer Account
Since the switch to the Fleet API, you’ll need a developer account:
- Sign in at developer.tesla.com (external link) with your Tesla account
- Create a new application (e.g. “Teslamate Homelab”)
- Provide a short description
- For local use, you can use localhost as the domain
Review takes a few days; for private use, approval is usually straightforward. The monthly $10 allowance is real credit — you don’t need to add a credit card as long as you stay under it.
Creating Tokens
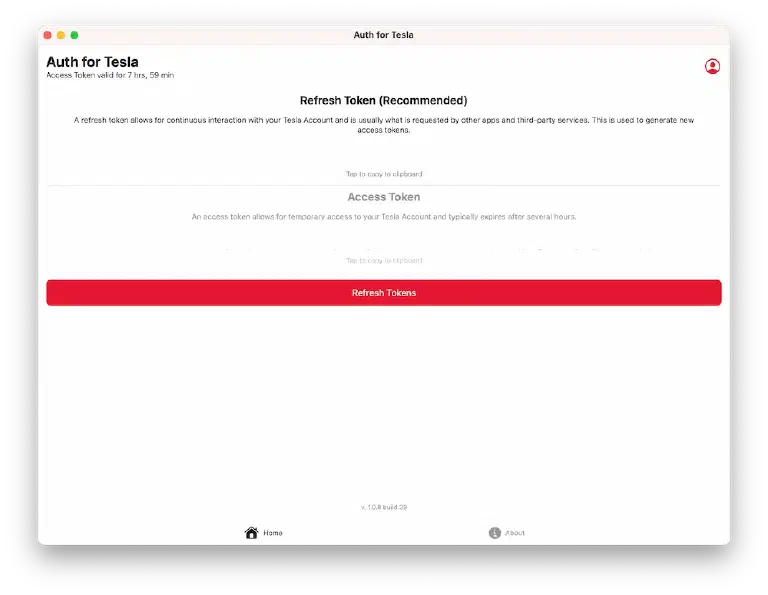
Authentication used to work with your username and password. Today you need a “Refresh Token” and an “Access Token.” The easiest way to generate these is with dedicated apps:
- iOS: “Auth for Tesla” (Apple App Store)
- Android: “Tesla Tokens” or “Auth for Tesla”
- Windows/Mac: “Tesla Auth” or web-based tools
Steps:
- Install the app and sign in with your Tesla username
- Enter your password
- At the second prompt, enter your 2FA code (not your password again!)
- The app shows a Refresh Token and Access Token — keep both somewhere safe
The tokens stay valid for several months. Teslamate refreshes the access token automatically.
Installation with Docker Compose
The easiest way to install Teslamate is via Docker Compose. If you don’t already have Docker Compose installed:
# On Ubuntu/Debian
sudo apt install docker-compose-plugin
docker compose version
Create a working directory:
mkdir ~/teslamate && cd ~/teslamateI’ll point you to the official documentation (external link) here, since the configuration changes fairly regularly.
Important adjustments for 2025:
version: "3"
services:
  teslamate:
    image: teslamate/teslamate:latest
    restart: always
    environment:
      - ENCRYPTION_KEY=your_secure_key
      - DATABASE_USER=teslamate
      - DATABASE_PASS=secure_password
      - DATABASE_NAME=teslamate
      - DATABASE_HOST=database
      - TZ=Europe/Berlin  # Your timezone!
      - MQTT_DISABLE=true  # If you don't need MQTT
    ports:
      - 4000:4000
    cap_drop:
      - all

  database:
    image: postgres:17  # At least 16.7 or 17.3!
    restart: always
    environment:
      - POSTGRES_USER=teslamate
      - POSTGRES_PASSWORD=secure_password
      - POSTGRES_DB=teslamate
    volumes:
      - teslamate-db:/var/lib/postgresql/data

  grafana:
    image: teslamate/grafana:latest
    restart: always
    environment:
      - DATABASE_USER=teslamate
      - DATABASE_PASS=secure_password
      - DATABASE_NAME=teslamate
      - DATABASE_HOST=database
    ports:
      - 3000:3000
    volumes:
      - teslamate-grafana-data:/var/lib/grafana

volumes:
  teslamate-db:
  teslamate-grafana-data:
MQTT for Home Assistant:
If you want to forward the data to an MQTT server (e.g. for Home Assistant
), replace MQTT_DISABLE=true with MQTT_HOST=mosquitto and add a Mosquitto container.
Start the containers:
docker compose up -dTeslamate is then reachable at http://{your-server-ip}:4000. On first launch, enter the tokens you generated earlier. After 1-2 minutes (waking the vehicle via the app may help), you should start seeing data.
Analysis with Grafana
A big advantage of the pre-built Docker Compose file: Grafana is included out of the box, reachable by default at http://{your-server-ip}:3000.
Default login (change immediately!):
- Username:
admin - Password:
admin
Grafana already has the PostgreSQL database configured as a data source, and all dashboards are pre-imported. If you’re running your own separate Grafana instance, you’ll need to import the JSON files manually from the GitHub (external link) repository.
Key dashboards:
- Overview: an overall summary of all metrics — the perfect starting point
- Drives: trip analysis with interactive maps, showing route, speed, and consumption
- Charges: detailed charging history with cost analysis per charge, and comparisons between charging stations
- Battery Health: long-term battery capacity trends, showing degradation over time and mileage
- Efficiency: consumption analysis by speed, temperature, and elevation — see what’s actually affecting your range
- Vampire Drain: standby consumption while parked, useful for spotting phantom drain
- Locations: frequently visited places, with automatic geofencing detection
- Updates: a history of every software update, with timestamps
Long-term Use and Insights
The real value shows up after several months. Here are some concrete examples from my own usage:
Battery degradation: my Model Y showed about 4% capacity loss after 50,000 km. 3-5% in the first 50,000 km is typical, and degradation slows noticeably afterward. With Teslamate you can see the exact trend and spot outliers (e.g. from BMS calibration).
Seasonal differences: in winter (around 0°C), my consumption sits at roughly 20-22 kWh/100km; in summer it’s 15-17 kWh/100km — about 30% more due to heating and a cold battery. That data is genuinely useful for route planning.
Cost optimization: home charging (€0.30/kWh) vs. Supercharger (€0.52/kWh) — the difference adds up. At 15,000 km a year, I save roughly €400 annually by charging at home. Even better: charging with solar surplus brings the cost down to about €0.08/kWh.
Efficiency: surprisingly, my optimal speed range turned out to be 90-110 km/h, not 70 km/h as I expected. Below 70 km/h, relative consumption creeps back up slightly due to auxiliary systems.
Troubleshooting
Teslamate shows “offline” instead of “asleep”: That’s expected behavior since Tesla firmware 2024.8+ — Tesla changed the API response, it’s not a Teslamate bug.
Token isn’t accepted: Use the Refresh Token (the longer of the two strings), not the Access Token.
No data:
Check the Docker logs with docker compose logs teslamate. Common causes: the vehicle is in deep sleep, wrong timezone, or network issues.
High API costs: Reduce the polling frequency, switch to Fleet Telemetry, or check for unnecessary wake commands.
Security and Backup
Network:
- Don’t expose it directly to the internet
- Use a reverse proxy with HTTPS (Nginx, Caddy, Traefik)
- Enable firewall rules
Backup:
docker compose exec database pg_dump -U teslamate teslamate > backup.sqlUpdates:
docker compose pull
docker compose up -d
Frequently Asked Questions
Does Teslamate cost money? The software itself is free. Tesla API costs apply, but are usually covered by the $10 free allowance. Only heavy usage adds roughly $2-5/month.
Does it work with the new Fleet API? Yes, fully compatible and kept up to date.
Does it drain the battery? No, the additional consumption is negligible.
Can I track multiple vehicles? Yes, each one is logged separately.
Conclusion
For me, Teslamate is the best solution for in-depth vehicle data analysis. The upsides:
- Full data ownership through self-hosting
- Detailed analysis with Grafana
- Low cost thanks to the free API allowance
- An active community
- Great fit for Home Assistant integration
The downsides: it requires technical know-how, your own server, and there’s no official support.
For Tesla owners with a smart-home or homelab streak, Teslamate is an excellent piece of software. After a few months of use, the analytics get genuinely interesting, once trends and long-term patterns start to show. Even while driving, the Grafana dashboards surface plenty of interesting data.
Tips for Advanced Users
Reverse proxy setup: For secure access on the go, I’d recommend a reverse proxy with a Let’s Encrypt SSL certificate. Traefik or Caddy fully automate the process.
Database optimization: On very old installations, a manual vacuum of the database can help:
docker compose exec database vacuumdb -U teslamate -d teslamate -z -vCustom dashboards: Grafana offers endless possibilities. You could, for example, build comparisons with other Tesla drivers, or visualize correlations between weather and consumption.
Further reading: